I posted ‘My Best Chocolate Chip Cookie – and it’s GF’ not too long ago.
You know what’s coming, now don’t you? I was wrong. I have a new best, although this is just an adaptation of the old best…… These are my best-est, BFF-est chocolate chip cookies – in fact they are right up there with my best cookies ever and are indeed GF, so the whole family is very excited about these cookies, and dang it, they are almost gone.
I hate it when everybody loves the cookies! But what is not to love? A little crispy on the outside – chewy on the inside, chocolate… do I need to go on? Seriously, these are good cookies.
I also made these without nuts because 2 guests coming to a gathering that night don’t do nuts. And I (who generally feel that nuts are an essential ingredient in any worthwhile chocolate endeavor) loved them. So the original recipe is here and the new recipe is………
Here!
GF Chocolate Chocolate Chip Cookies
My Best GF chocolate chip cookies – vegan as well!!
– adapted from I.S. at Yahoo Voices
1 cup Bob’s Red Mill GF baking mix (or your favorite GF baking mix)
½ c almond meal (or dried and pulverized leftover almond milk mash – that’s what I use)
½ c brown rice flour
1 ½ tsp baking powder
1 tsp baking soda
1 Tbsp tapioca starch or potato starch
1 tsp guar gum
½ c brown sugar
½ tsp salt
1 1/2 Tbsp cocoa powder
½ c pure maple syrup
½ Tbsp blackstrap molasses
3 tsp pure vanilla extract
½ cup + 1/2 Tbsp organic neutral flavored oil (I used avocado)
½ – 2/3 c non-dairy chocolate chips
Preheat oven to 350°F.
Mix the dry except chips
In a separate bowl, combine the maple syrup, molasses and vanilla, then stir in the oil until well combined.
Add the wet mixture to the dry, along with the chips, and stir until combined
Place ½ Tbsp scoops on a baking sheet lined with parchment paper and flatten a little.
Bake for 12-14 minutes, rotating halfway through until browning just a tad on the bottom. Mine puffed up slightly and then started to deflate. That’s when I took them out.
Cool on a wire rack before removing from tray.
As Little Sis always says….. and she comes from a very bright family I hear – Eat that chocolate cookie while it is still warm!!
And if you’d like some more chocolate chip recipes…. we happen to have a few others.
The other day when I entered the kitchen to attempt to follow my meal plan for the week, I discovered that despite all my careful planning, I was missing a key ingredient for the dish I planned to make. What’s a Mom of hungry children to do? Divert from the plan is the only answer, but the question is what level of diversion. Rather than coming up with a whole new game plan, I decided to simply make some changes to the recipe based on the ingredients I DID actually have on hand. This is a common strategy on my part, and has nearly always resulted in some level of success. My success at making these change ups is likely because i don’t just replace the missing item with any old thing.( Read here for my suggestions on adapting, changing, and experimenting with recipes in ways that are more likely to create a successful outcome.)
On this particular occasion I was short the chickpeas required to make Chickpeas with Potatoes and Tomatoes according to Deborah Madison’s recipe in Vegetarian Cooking for Everyone (see my thoughts on Deborah Madison). I know, I know – me out of chickpeas, it’s almost too much to believe, but I tried not to linger on that ridiculous reality and moved quickly to surveying what I DID have available. And what I DID have was some already cooked lentils (always cook extra of staples – see here for why). Yay! I pulled the lentils out as well as the other ingredients and got down to business. It occurred to me that while the lentils were going to play the same nutritional role as the chickpeas (protein, fiber), they are so radically different in size and texture I supposed there may be some consequences for the switch. But I proceeded and just sort of kept my eyes open for things that needed tweaking.
As it turned out, the lentils did give the dish a very different flavor and overall feel. They also seems to take up some of the liquid from the dish, even though they were already cooked, I added to the tomatoes called for in the original recipe and then added some extra seasoning to make up for the additional volume. It was a delicious dish and scored a 75% percent approval rating in our house, Ms. Picky Pants was, not surprisingly, not a fan. I was a simple dish with delicious flavors and while it was nice and warming on a chilly day, I’m told it can also be served cold with lemon wedges and black olives. I have some ideas for summer!
Lentils, Potatoes, and Tomatoes – inspired by Deborah Madison’s Chickpeas, Potatoes, and Tomatoes in Vegetarian Cooking for Everyone
Olive oil for the pan
1 large onion, chopped
3 red potatoes, peeled and diced (I went slightly larger than a dice and used the three small russets I had on hand – I also didn’t peel them, I know I’m bad)
2 carrots cut into small rounds (less than 1/2 and inch so they cook in a reasonable amount of time)
a pinch to 1/2 t chili powder or smoked paprika, depending on your heat preferences
2 smashed garlic cloves
1 t ground coriander
2 1/2 c diced tomatoes (I used cans and did not drain them)
2 1/2 cups cooked lentils (I used French as that’s what was in the fridge waiting to be used)
1/2 c raw cashews (or 1/2 c more beans)
salt and pepper to taste
1/2 c water (or enough to make a broth to simmer in)
1/2 c chopped cilantro
1/2 c chopped parsley
Warm oil in skillet over medium heat. Add onion and sauté until onions are beginning to color – 5 to 10 minutes. Add potatoes, carrots, chili, and garlic and cook for a few more minutes. Add the tomatoes, lentils and salt and pepper to taste. Cover and bring to simmer. Simmer until veggies are tender. About 25-30 minutes. Taste for seasoning. Stir in fresh herbs and cashews if using.
We served ours with lemon wedges and quinoa. Absolutely delish!
I was going to leave the title as just ‘Shepherd’s Pizza’ thinking it might intrigue millions, or thousands of readers into opening this post. Then I thought perhaps I’d better offer just a little explanation, or maybe nobody would read it except for my mother.
So now that you are here…. you are still perhaps wanting a little more explanation? This started as an attempt on my part to create a pizza crust out of potatoes (and a few other things). Well, it did not turn out to be something that you could pick up. More specifically, not pick up and take a bite that was several inches away from where you were holding it. You could pick this food up in your hands if you are so moved, however…. it won’t be pretty.
“Alas, failure! I signed.” Then my son said, “You should make this more often Mom!”
Ho ho! Music to my ears on getting healthy food into my people! I saw beyond failure and into the land of opportunity where lies the naming of something weird and different than what was expected. What to name this soft layer of potato-y goodness topped with pizza stuff. Upside down Italian Shepherd’s Pie came to mind. The Italian word for shepherd is pastore by the way 😉
So, I would be happy to share Pastore Potato Pizza with you!
Pastore Potato Pizza
2 qts chopped and boiled red potatoes. (I left the skins on)
1/2 cup nutritional yeast flakes
1/2 cup cashews that have been soaked in 1 cup water for at least 6 hours and then drained.
1 – 2 Tbsp milk of choice
3 Tbsp chia seeds
1 Tbsp olive oil
1 tsp salt or to taste
1/2 cup rolled oats
1 tsp salt
Pizza toppings or any roasted vegetables or cheeses that you like
– Pre-heat oven to 375
– Boil the potatoes until very tender and drain
– Drain the cashews and blend or process with the yeast flakes, milk and olive oil until fairly creamy.
(The milk is purely to get this mixture to mash, so start with just a little and see if you need more.)
– Place everything, including the blender goo in a large bowl and mash away.
See the chia seeds hiding in the potato cave? And the cashew lava creeping down the mountain? Okay, so the imagination thing can be a problem for me 😉
– Place parchment paper on a pan or two and spread a layer about 1/4 -1/2 inch thick on the parchment paper.
– Bake for 20 – 30 minutes. I left one in for 20 and one in for 25. Neither burned but the one in longer started to get a little puffy. It might be good to leave them in longer but I don’t think they will ever get dry enough to be crusty and I didn’t notice much difference at the end either.
– Top with your choice of stuff and pop back in to heat up the toppings. I did not put raw veggies on top as I was afraid the sweating of those veggies would make the whole thing too soupy.
We topped one with leftover spaghetti sauce that had colored peppers in it plus vegan parmesan
The other I brushed with olive oil, sprinkled on slightly steamed broccoli, green olives and vegan parmesan. Of course my son wouldn’t touch this one, but it was my favorite.
A switch from flour or grain based dishes. Some favorite flavors. Overall a failed crust with a happy ending!
Thinking of planting potatoes this year? Little Sis has had luck with this method.
Once in awhile we post someone else’s recipe as is – unchanged. I confess that part of my just taking the easy road and making this by actually following directions was that I was in a hurry. You see I had to come up with some GF dessert that would make non-GF son feel like his birthday had been adequately celebrated. Following Little Sis’ lead (see another birthday cake for Bigg Sis), I turned to Angela Liddon.
It is always an honor to point anyone in the direction of Angela Liddon who has a blog and a lovely cookbook that features vegan recipes. I do believe that her specialty is sweets. In fact she had a shop where she sold amazing vegan bars and baked goods before becoming a successful blogger and cookbook author. Give this to-die-for fudgy mocha pudding cake a try and then buy her cookbook because the non-sweets in it are excellent as well!
Back to the cake….. Last night we celebrated our boy, well, young man’s 14th birthday with a bunch of his friends playing football, video games, eating pizza and I’m ashamed to say, a store bought cake. Mr. Bigg Sis and I ate some and made yucky faces at the overly sweet, oddly gummy concoction with way too much icing. I vowed to do better the next night when the 3 of us would celebrate family style. The headache that came soon after (yes, I am a sensitive and delicate creature for sure) was also good motivation to get my tail up and cooking the next day.
So here is the recipe – totally ripped off but heartily acknowledged.
Fudgy Mocha Pudding Cake by Angela Liddon
1 Tbsp ground flax seed
1 1/2 c oat flour (make sure its GF if you need totally GF)
3/4 c plus 1/3 c sugar (she recommends coconut – I used plain organic cane sugar)
1/3 c plus 2 Tbsp cocoa powder
1/3 c chocolate chips or chopped chocolate (she uses non-dairy choc. chips)
3/4 tsp salt (she used fine grained sea salt
1 1/2 tsp baking powder
3/4 c almond milk
2 Tbsp coconut oil, melted
1 1/2 tsp vanilla extract
1 1/4 cup hot coffee or boiled water (I used decaf – not very strong)
confectioners sugar and toasted walnuts are optional toppings
Mix the ground flax seed with 3 Tbsp water in a 2 cup measuring cup, mix and set aside
Pre-heat oven to 375 and lightly grease an 8×8 pan (I used coconut oil)
In a large bowl, mix flour, 3/4 c sugar, 1/3 c cocoa powder, choc chips, salt & baking powder
Add the coconut oil, milk and vanilla to the flaxseed mixture and whisk / stir together
Mix the wet and dry together and pour into prepared pan and make even and flat with a spoon or spatula
Mix 1/3 c sugar and 2 Tbsp cocoa and sprinkle over the cake
Pour the hot coffee slowly and gently over the top of the cake
Bake for 27 – 33 minutes or until semi-firm on top and bubbly on the sides – mine was a tad overdone at 27 minutes, so check at 25.
Let cool for 5 – 10 minutes and then top if you like with sugar, walnuts or ice cream of your choice.
Now this may not look that good, but appreciate the consistency of the pudding like stuff that comes out with the cakey-like stuff. Really quite something. Everyone had seconds. In fact I’m still full….. no room for the snack I usually eat at bedtime to prevent waking up at 2 am so hungry I have to go get a snack. Okay, so I’m a rather ravenous but sensitive and delicate creature…. but I know a good real food GF cake when I eat one!
I am still on a quest to share uses for Tabil spice mix with the world – particularly the subset to whom I gave home roasted Tabil as a Christmas gift. The presence of cumin and red pepper flakes speak to chili, and the rest of the tabil ingredients (coriander, caraway and garlic) seemed different enough to twist the chili up a bit. I also thought that a different base than rice would be nice. We do fall back on rice a lot around here, and although I’m glad to have it (and my son could probably eat it 3 times a day), nutritionally speaking, variety is indeed a spicy and healthy thing. Enter the much maligned potato. Potatoes have been bred into giant, dry, starchy behemoths that are meant to be smothered in fattening dairy products. However, the little colored potato with all of it’s positive nutritional status is turning up in all kinds of places. I recently got 5 lbs. of organic little red taters for 4.99. That’s cheaper than the rice I use. Woo hoo!
I’m thinking that all of you are as ready for simple as I at this time of year, and the Tabil helps keep this simple. If you don’t have any Tabil, it is pretty easy to make* and once you have it…. next time will be really easy! (Or you can buy it here). If roasting potatoes does not seem simple, then by all means make some rice – but the rest of this recipe is really quick and easy.
Tabil Spiced Chili
About 2 lbs. red potatoes cut into small chunks for roasting or rice
Oil for sauteeing onion
1 Red onion, diced
1 Tbsp + 1 tsp Tabil spice mix
1 Tbsp chili powder
1 28 oz. can diced tomatoes (I use Muir Glen because the cans do not have BPA in the liner)
1 6 oz. can tomato paste (Muir Glen again – same reason)
1 bunch swiss chard (or other hearty green) washed and cut or torn into pieces
1 – 2 colored peppers cut in chunks
1 small can (15 oz. ) black beans, rinsed and drained
Potatoes:
If roasting potatoes – allow 30 – 45 minutes at 400, depending on how small you cut the potatoes. I made these bite sized because they are the base of the chili, therefore they roast faster and get crispier. We snuck some before adding chili and I think I will roast potatoes this way always 🙂
Either toss it all in a bowl with oil to coat (I prefer avocado because it withstands high heat), or just stir oil in right on the roasting pan. Add some salt to taste and stick in the oven. Stir after 15 or 20 minutes.
Chili:
Saute onion until becoming translucent
Add spices and stir until fragrant
Add tomatoes & paste, stirring occasionally over medium low for 10 minutes to heat
Add swiss chard and cook until wilted
Add peppers and beans and let simmer for another 5 or so minutes
Steamy!!
Serve over the potatoes
The peppers were crunchy, everything else soft and spicy. We all enjoyed this very much. My son, who is a charter member of the no-food-touching club chose to eat his potatoes on the side.
My husband and I mixed it all together and then argued – gently discussed – who would get the leftovers for lunch. I won!
Stay warm friends – soon it will be time for seed catalogs and dreaming of warmer days. For now, I’ll try to heat up my insides a bit with food and laughter.
* If you do decide to make your own Tabil, I have since made it in my Vita Mix which was faster and an easier clean up than my coffee grinder. In addition, I recommend not adding garlic powder until after grinding to avoid sending a cloud of garlic dust into the air 😉
I love for my son to have a bunch of friends over to eat pizza and play games. But I don’t like eating a bunch of pizza – and my husband cannot eat a bunch of pizza, so while the kids were racing Kartts around the track (4 people / 4 corners of the screen – how DO they do that!?), the kitchen was filling with the enticing aroma of roasting butternut squash, onions and garlic.
This is not a new combo around here. In fact I posted a recipe for such a concoction that includes walnuts and red potatoes from an original made with pasta a parmesan, but I decided to try using my parmesan substitute made from sesame seeds, sunflower seeds, nutritional yeast flakes and salt and we were both very pleased with the results.
See how pleased we were? This is actually a picture from the post that includes the walnuts – back in my young and frivolous days when I had time to draw with a sharpie on the outer layer of a perfectly good onion. Ah youth! But seriously – this is an easy fix and ’tis the season to pick up some squash for a little less. The recipe is on the small side – enough for a good meal for 2 plus a large leftover lunch. I’ll pick up a couple of squashes next time!
Roasted Squash Bowl with ‘Parm’
1 butternut squash, peeled, de-seeded and cubed
1 onion, cubed
2 – 3 cloves garlic, minced or crushed
1 Tbsp high heat oil (I used avocado)
Juice from 1/2 lemon
sprinkle of red pepper flakes
1 tsp salt
Cooked brown rice
Vegan parmesan (recipe here along with other dairy free pasta toppers and below)
Pre-heat oven to 375
Toss squash and onion with garlic, oil, lemon juice, salt and pepper flakes
Spread on pan and roast for 30 – 45 minutes or until tender
While roasting, cook rice according to package directions
1/2 c sunflower seeds
3/4 c sesame seeds (I used raw rather than toasted)
1/4 c nutritional yeast flakes
1/2 tsp salt
Place all ingredients in blender
Blend until powdery – don’t go too long or the sunflower seeds will start to turn into sunflower butter!
Place rice in a bowl, top with squash mixture and ‘parm’ to taste. My parm has black specks because I used black sesame seeds. I also didn’t grind the parm long enough because there are intact sunflower seeds. Yikes – how did I have time to draw on vegetables in the past, now I don’t even have time to grind the sunflower seeds? Ah well – it still tasted terrific.
We have a new series starting this year on wellness. Check out Little Sis’ first post in this series…. 2015: A Year of Well Being We’ll be adding to this as the year moves along – and it will, probably blindingly fast at times. May we all pay enough attention to see the beauty and love that we encounter in the kitchen, at the table, in fellowship and in the world around us.
Ha! Don’t you love just the idea of carrot cake? Why not replace some of the other moisture for a cake (like oil or eggs or milk) with some nice wet produce? Why not indeed. Anytime you can make something yummy that has produce in it, that’s a plus. And carrot cake is even socially acceptable. You don’t have to lie about what those little orange bits are in the cake. This recipe is a favorite of our Step-Mother and she made it for Little Sis on one of their first evenings getting to know each other – what Little Sis fondly refers to as their ‘first date.’ Here’s to first dates, healthier cakes and parents who are wise enough to bring fabulous new people into their children’s lives.
So Step-Mo, also being very generous and wanting to look out for everyone, wanted Mr. Bigg Sis to be able to eat carrot cake as well, so we went GF and the results were truly delicious.
Step-Mo’s GF Carrot Cake
(based on Fran’s Carrot Cake)
1 1/2 cup vegetable oil. (I recommend avocado)
3 eggs (or flax eggs if you prefer)
1.5 – 2 cups sugar depending on how sweet your tribe is accustomed to
1 tsp salt
1 cup GF flour (I used Bob’s Red Mill Baking Mix)
1 cup oat flour (you can pulverize oats in the blender to make the flour)
2 tsp cinnamon
2 tsp baking soda
2 tsp vanilla
2 cups grated carrots
2 cups flaked coconut (We used sweetened)
1 15 oz. can chopped pineapple – drained
1 cup chopped nuts (we used pecans)
Pre-heat oven to 350
Cream the wet ingredients together
Blend the flour, spices, salt and baking soda
Combine the two mixtures.
Then add carrots, coconut, pineapple and nuts
Grease and flour a bundt panBake 1 hour at 350 – until toothpick comes out clean
We dusted with just a touch of powdered sugar for looks. The original recipe (from a personal friend) suggested cream cheese icing but this is a sweet cake – I don’t think it needs icing. And it is very moist.
We enjoyed this and most of all because it was prepared for and shared with people we love. It’s been a terrific year and we thank you for visiting us here at the pantry. If you are looking for some encouragement and guidance in improving your nutrition and health in the New Year, check out our e-book, Baby Steps to Better Health. Also great to share with a friend or loved one.
We wish you all a very happy and safe celebration of all that you’ve experienced, learned and loved this year with high hopes for a healthier New Year marked by peace and love.
It can be dangerous to try and make something wonderful even better…. I guess. Some might warn, “Why fix it if it ain’t broke?” Well, in this case, pushing the limits of good leaves us with 2 yummy alternatives…. and 1 caveat. (I’ll get to that later)
Little Sis and I offered you some easy Roasted Butternut Squash Soup a couple of years ago. I wanted to take it to a women’s group for which I offered to bring soup and decided that I wanted something with some protein as we were pairing it with bread and salad. I also thought that some roasted garlic would enhance the experience as well, so…. cashews and garlic are part of the adapted version. It got rave reviews.
Now for the caveat…. Apparently roasted onion, squash and cashews can be a potent digestive combo for some who are inclined towards affecting greenhouse gas levels in a rather socially unacceptable way. Will I eat this soup again? Indeed. I will do a little math, figure out where I have to be in about 20 hours after eating it and adjust accordingly. Will I ever let my husband eat it again? Indeed NOT! 🙂 Luckily he has many fine qualities, so if he eats some of the leftover soup I will forgive him. So let your digestion guide you, but I promise you won’t regret trying this soup!
The recipe is for 2 butternut squash and of course size will vary so add stock a cup at a time and see what you think of flavor / consistency.
1 cup raw cashews soaked in about 2 cups water for at least 6 hours
2 butternut squash – cut in half lengthwise and seeds scraped out.
2 med – large onions, peeled and cut in half
4 – 6 cloves of garlic (I used 4 enormous cloves) left in their papery shell
2 – 4 cups of vegetable stock
2 cored but unpeeled apples (I used Gala)
1/2 – 1 tsp sage
1 tsp salt (or to taste)
Roast the squash, onion and garlic at 400 degrees for 40 – 60 minutes or until tender.
Remove the garlic at about 20 minutes and peel when cool.
Once everything is tender, remove from oven and let cool so you can handle a bit to scoop the squash out of the skin.
I heated the apples in the microwave to soften them, but you could probably roast them for the last 10 minutes or so as well!
Drain the cashews.
Place batches of all the ingredients in a power blender or into a pot with a stick blender. Make sure you put some liquid in each batch of the blender to help it go.Pour back into a pot and stir. Warm if necessary and serve.
Your taste buds will love you for this one! – caveat and all. Caveat is a nice polite word for it, don’t you think?
Don’t know what it’s like in your neck of the woods, but we’ve settled into pretty sustained soup and stew weather around here, which is just fine by me. I could eat soup every day and be totally happy about that. Unfortunately not all the members of my little tribe feel as universally friendly to soup as I do, so I am pretty constantly trying new versions to try to draw the resisters in. This week I thought I’d rely on the appeal of tomato based recipes and try something new. And so we did.
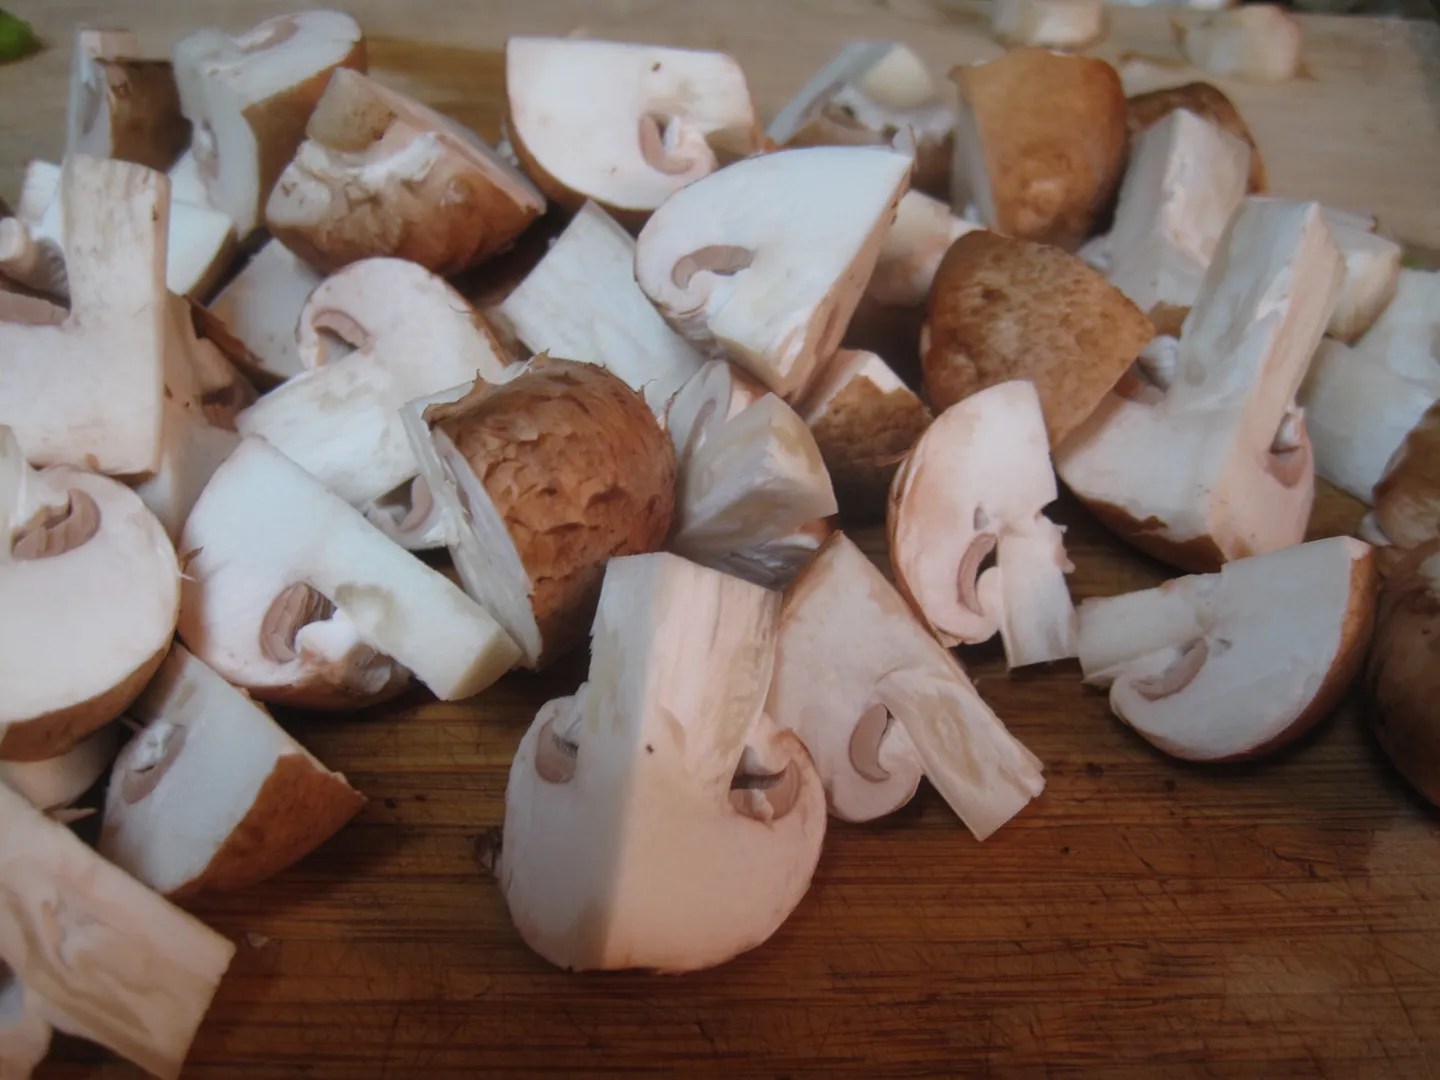
I found a gumbo recipe in my More With Less cookbook, which tends to offer a wide variety of flavor profiles in fairly simple recipes that don’t tend to rely on too many exotic ingredients. Sounds like a good way to go, eh? The original recipe was for chicken gumbo, but I decided to use sautéed mushrooms instead. We often replace meat with lentils or a lentil bulgur mixture, but having had a fair amount of those recently, I thought we’d put the umami of the mushrooms to work for us. The result? An approval rating of 75%, which is an A- for the cook in our house. Yes, we grade on a sliding scale based on reality. This gumbo, while originally called “spicy” was not particularly so, so if that’s your thing you should crank it up a bit in the chili department. On to the gumbo…
Mushroom Gumbo
oil for the pot
1 large sweet onion
2 cloves garlic, minced
1 green pepper, diced
2 T flour (I used white whole wheat)
1 large can or box chopped tomatoes
1 1/2 c frozen okra
2/3 c tomato paste
3 c veggie broth or stock
1 1/2 t salt
1/4 t pepper
1 1/2 T soy sauce or Bragg’s
1/8 t ground cloves
1/2 t chili powder
pinch dried basil
1 bay leaf
about 12 oz mushrooms, chopped into rough quarters (I used cremini)
1 T gumbo file (no idea why I had this in the pantry, the original recipe says it is optional)
chopped parsley for garnish
cooked rice for serving
Warm the oil in a large pot. Add onions and sauté until translucent, stirring occasionally. Add garlic and sauté for 30 seconds or so, until the garlic becomes fragrant. Add green pepper and sauté for an additional minute or so. Add 2 T flour and stir in, cook for another minute or so, stirring to prevent the flour mixture from burning. When peppers have begun to grown tender add the rest of the ingredients and bring to gentle boil. Drop heat to a simmer and cook for about 40 minutes.
While stew is simmering, sauté mushrooms in a pan of warm oil with a dash of salt. Let them sit to brown a little – which means don’t turn them too much. When the mushrooms are browned, add to gumbo pot to simmer together. When gumbo is warmed through and flavors have developed, serve over rice with a sprinkle of parsley. Delish!
What to bring or serve for the bread portion of Thanksgiving that is gluten free? Those that eat gluten will probably not enjoy the GF standard version, so usually I supply corn bread or corn muffins to round out the meal for GF and non-GF eaters alike. I have been hankering for my GF Banana Biscuits and was tempted to introduce banana to the Thanksgiving menu despite all evidence that residents of New England have never found a banana anywhere but in a modern grocery store. So, in true Little Sis fashion, I decided to just change up a good recipe to create a more appropriately seasonal biscuit. Which of course leads us to pumpkin…. No, not the 4 that are still sitting on my porch in lieu of the Christmas decorations that are already springing up all around us…. I opted for the can of pumpkin in the pantry.
Turns out pumpkin puree makes an easy substitute for banana, add a little sugar (if you like) and voila. The three of us really enjoyed these biscuits (which I had the sense to test prior to Thanksgiving Day) with our ‘Not Just Kramer’s Mulligatawny’ – Vegan Curry Soup.
As an aside, I was inspired to make this delicious soup because I have been horning in on Little Sis’ weekly meal plans. She has kindly published her weekly meal plan for the last 3 weeks (here’s week 1 and week 2) and oooh is it nice to just check it out and make what she picked 😉 She is so smart that Little Sis of mine. I want to be just like her when I grow up.
At any rate – back to the biscuits as I’m sure you have plenty to do today!
Pumpkin Biscuits (GF/DF)
1 1/2 cup gluten free flour mix (I used Bob’s Red Mill)
1 Tbsp baking powder
1 tsp guar gum
1/2 tsp salt
1-2 tsp lemon zest
1/2 – 1 Tbsp. sugar
1/2 cup pumpkin puree
1/3 cup milk (I used unsweetened almond)
3 Tbsp hard coconut oil (Cool it down a bit first if it is not firm)
Pre-heat oven to 375
Mix the dry ingredients and zest together.
In a separate bowl (or large glass measuring cup), mix the pumpkin and milk.
Cut the coconut oil into pieces and mix in with a pastry cutter or a large fork if you don’t have a pastry cutter.
Add the mixed pumpkin and milk and stir to combine but don’t over-mix or mash.
Now I just pinched off big pieces and patted them slightly into biscuit shape and laid on an ungreased baking sheet. If you want more uniform biscuits I guess you could roll them out and cut them.
Place on a cookie sheet
Bake for about 12 – 14 minutes or until browning just a touch on top
Eat warm.
I doubled the recipe because we LOVE leftovers and they stacked up neatly in a tall container:

 I hate it when everybody loves the cookies! But what is not to love? A little crispy on the outside – chewy on the inside, chocolate… do I need to go on? Seriously, these are good cookies.
 Olive oil for the pan
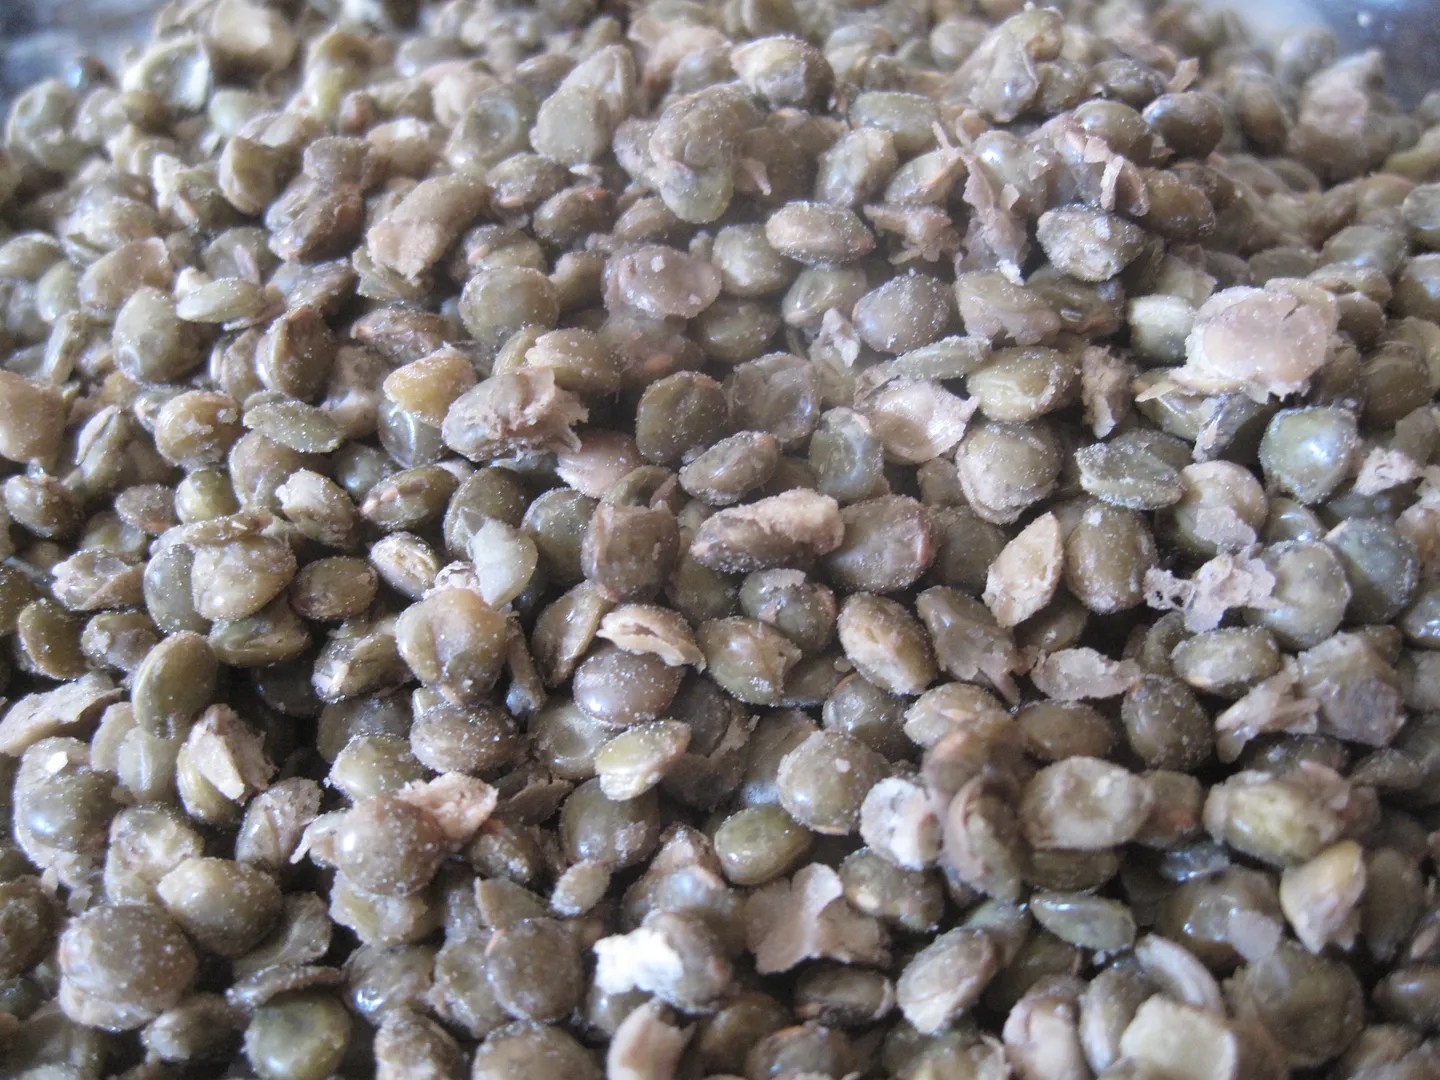


 Have a wonderful and very Happy Thanksgiving!